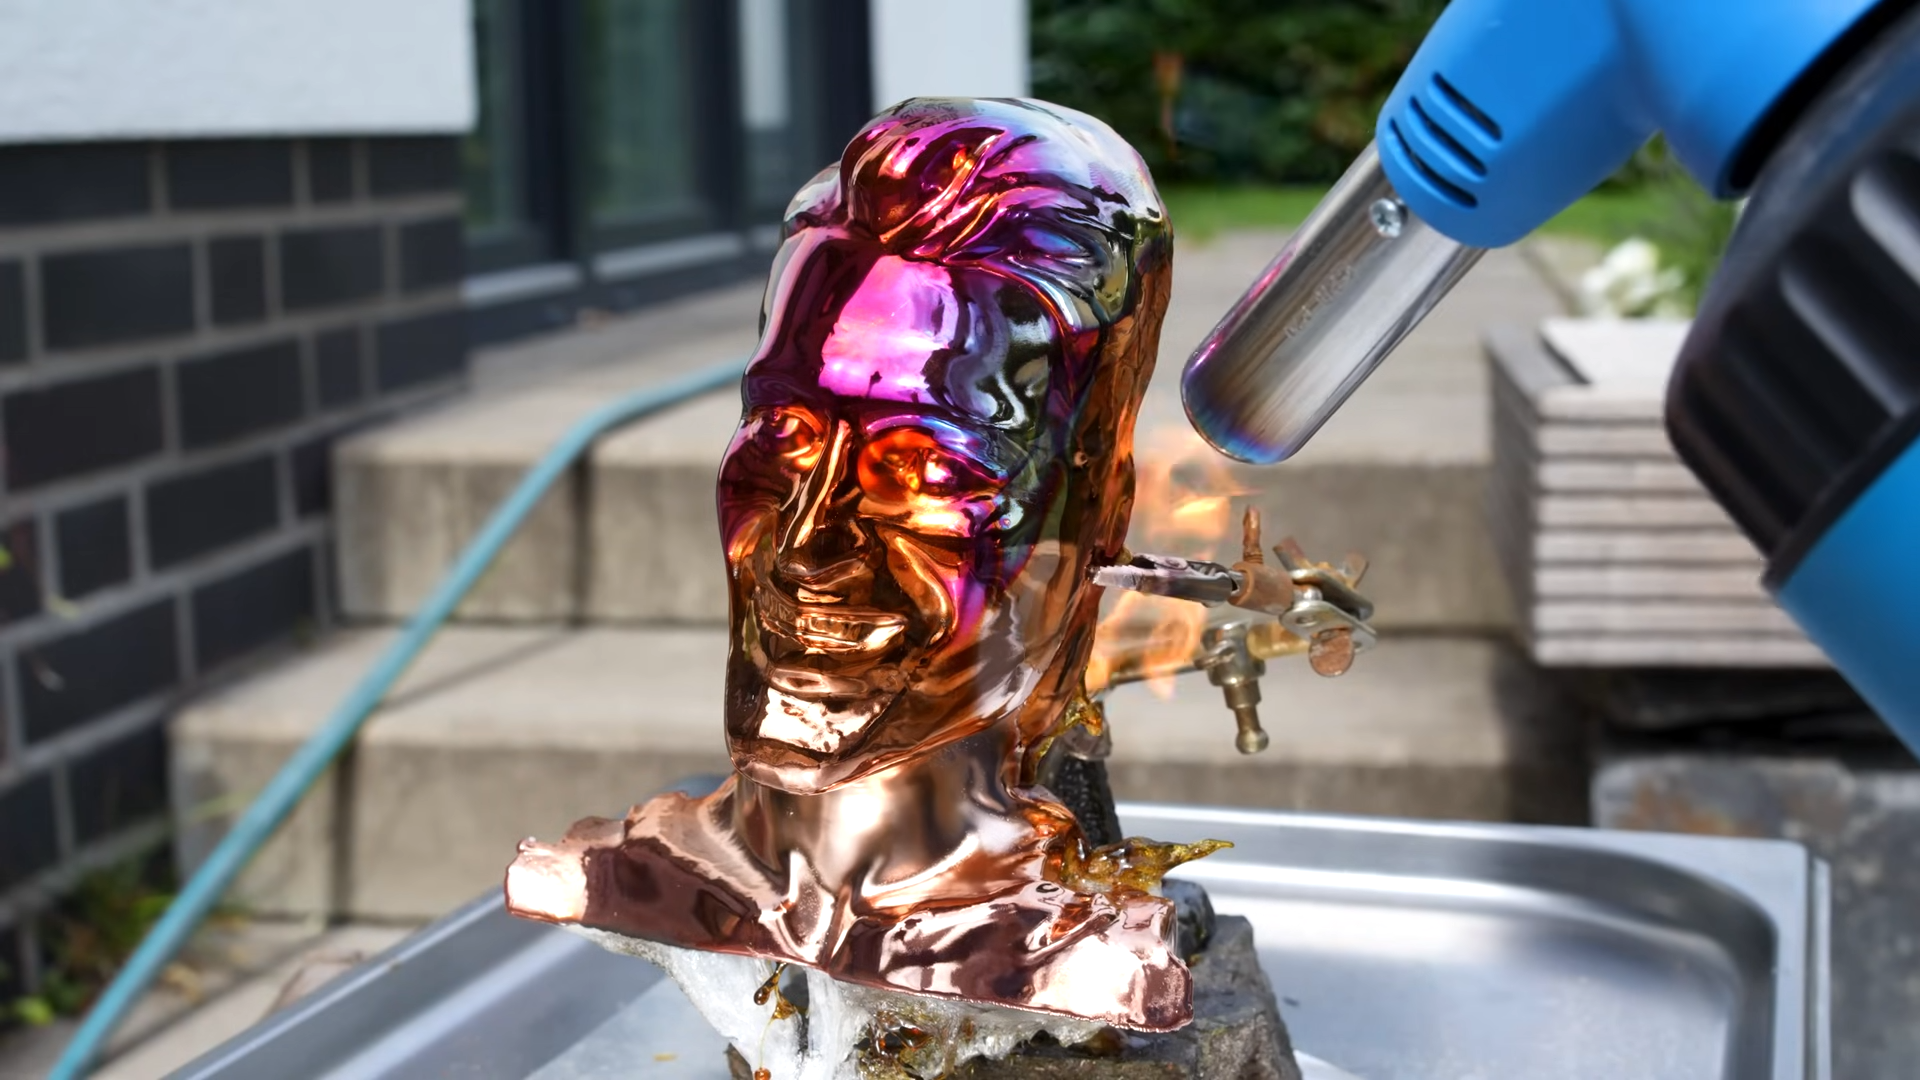
Blowtorching Electroplated 3D Prints For Good Reason
-
What if you electroplated a plastic 3D print, and then melted off the
plastic to leave just the metal behind? [HEN3DRIK] has been experimenting
with just ...
Sunday, May 30, 2010
Raceduino Live!
My Raceduino project concept has been posted! I mainly wanted to put an overview of the design together to try and capture all of the features that could ever be useful. Now it's time to start working on the individual stages of the project, starting with the Kent "No-Power" Display that will be central to it. Next week I'll be posting basic display driver code based on the SPI commands listed in the Datasheet, then its off to writing some higher level functions to draw lines, etc. on the display. I'm doing all of this on my Duemilanove for now, but I think the final product will need something more beefy, such as the Mega. Any other 'Duino based boards I should take a look at? (I'm mainly interested in tons and tons of digital I/O)
Sunday, May 23, 2010
RGB LED Fun

Here's the first thing I programmed up with my new Arduino! (I'm not new to Atmel μcontrollers but new to the Arduino) It's just a diffused RGB LED that goes red-green-blue-yellow-purple-turquoiseish (last one was supposed to be white, got tired of fiddling with it). Figured I'd post the code since Sparkfun didn't have a link for an Arduino example, just the Wiring example I took and modified. All that really needs to change from the example is the PWM pins since they are different on the Arduino.
int RED = 3; // RED pin of the LED to PWM pin 3
int GREEN = 6; // GREEN pin of the LED to PWM pin 6
int BLUE = 5; // BLUE pin of the LED to PWM pin 5
int gw = 0;
void setup()
{
Serial.begin(9600);
}
void loop()
{
for(int r = 0; r < 64; r+=1) {
analogWrite(BLUE, 0);
analogWrite(GREEN, 0);
analogWrite(RED, r);
delay(60);
}
for(int g = 0; g < 64; g+=1) {
analogWrite(BLUE, 0);
analogWrite(RED, 0);
analogWrite(GREEN, g);
delay(60);
}
for(int b = 0; b < 256; b+=4) {
analogWrite(RED, 0);
analogWrite(GREEN, 0);
analogWrite(BLUE, b);
delay(60);
/* Code if you want to "see" what's going on the Serial Monitor, useful for debugging
Serial.print(r);
Serial.print("\t");
Serial.print(g);
Serial.print("\t");
Serial.print(b);
Serial.println();*/
}
for(int y = 0; y < 64; y+=1) {
analogWrite(BLUE, 0);
analogWrite(RED, y);
analogWrite(GREEN, y);
delay(60);
}
for(int p = 0; p < 64; p+=1) {
analogWrite(BLUE, p);
analogWrite(RED, p);
analogWrite(GREEN, 0);
delay(60);
}
for(int w = 0; w < 64; w+=1) {
analogWrite(BLUE, w);
analogWrite(RED, 0);
gw=w;
if(gw != 0)
gw+=5;
analogWrite(GREEN, gw);
delay(60);
}
}
Next I'll be posting about the project that I actually got all this hardware for; note the Kent Display in the pic :)
Sunday, May 16, 2010
First Post
Kind of a placeholder first post, I'll be posting an Arduino test project later, but I had this "prayer" sitting around after stealing it from somewhere... and I get to link my mustang's first run with the 427!
The Mustang is my shepherd;
I shall not want.
It maketh me burnout on black pavements;
It leadeth me beside busy freeways;
It restoreth my soul;
It leads me in the path of quickness for its names sake.
Yea I walk through the valley of rice, I shall fear no turbo for Torque art with me.
Thy rod and thy piston they comfort me.
Thou preparest a track for me
in the presence of mine enemies.
Thou hast anointed my bearings with oil;
My car overpowers.
Surely traction and victory shall follow me,
All the days of my life.
And I shall dwell in the house of the V8 forever
Amen
Labels:
427 windsor,
car,
drag racing,
mustang,
mustang prayer,
video
Subscribe to:
Posts (Atom)

